Test your Python code with pytest
Testing your Python code is a fairly easy task, and this step-by-step guide will get you started on how to use it in your algo homeworks. It will not go in-depth, but will give you everything you need to properly and cleanly test your code.
Note that this is not a proper setup for big applications, and is only intended for small homework-style projects.
Before we start
EPITA stuff
One thing to note is that the format required for submission makes testing our
code a little bit more complicated. Because it has a dot in it, it is impossible
to import it like any other module in Python using the good old
from <module> import <stuff>. Moreover, the dynamic import method recommended
on Nathalie Bouquet’s website would make it impossible to use autocompletion in
your favorite IDE or code editor. I recommend that you keep the basic name of
login_<homework>.py as it was given to you and only modify it when you are
ready to submit. That way, you can import everything in your test file as just
from login_<homework> import *.
Another thing to remember is that YOU MUST NEVER SUBMIT TESTS. Keep your tests in a separate file!
It might sound dumb, but make sure you install Python! We will need to install a
few things through pip, which is Python’s package manager.
SHARING UNIT TESTS WITH FELLOW STUDENTS MAY BE CONSIDERED TO BE CHEATING AND IS SEVERELY PUNISHED AT EPITA. DO NOT SHARE YOUR TESTS WITH YOUR FRIENDS, AS THAT COULD EARN YOU A MAGNIFISCENT CHEATING FLAG (the famous Flag Triche).
Visual Studio Code tips
Any editor will do for this guide, but some have very handy features we can use: VS code is one of them.
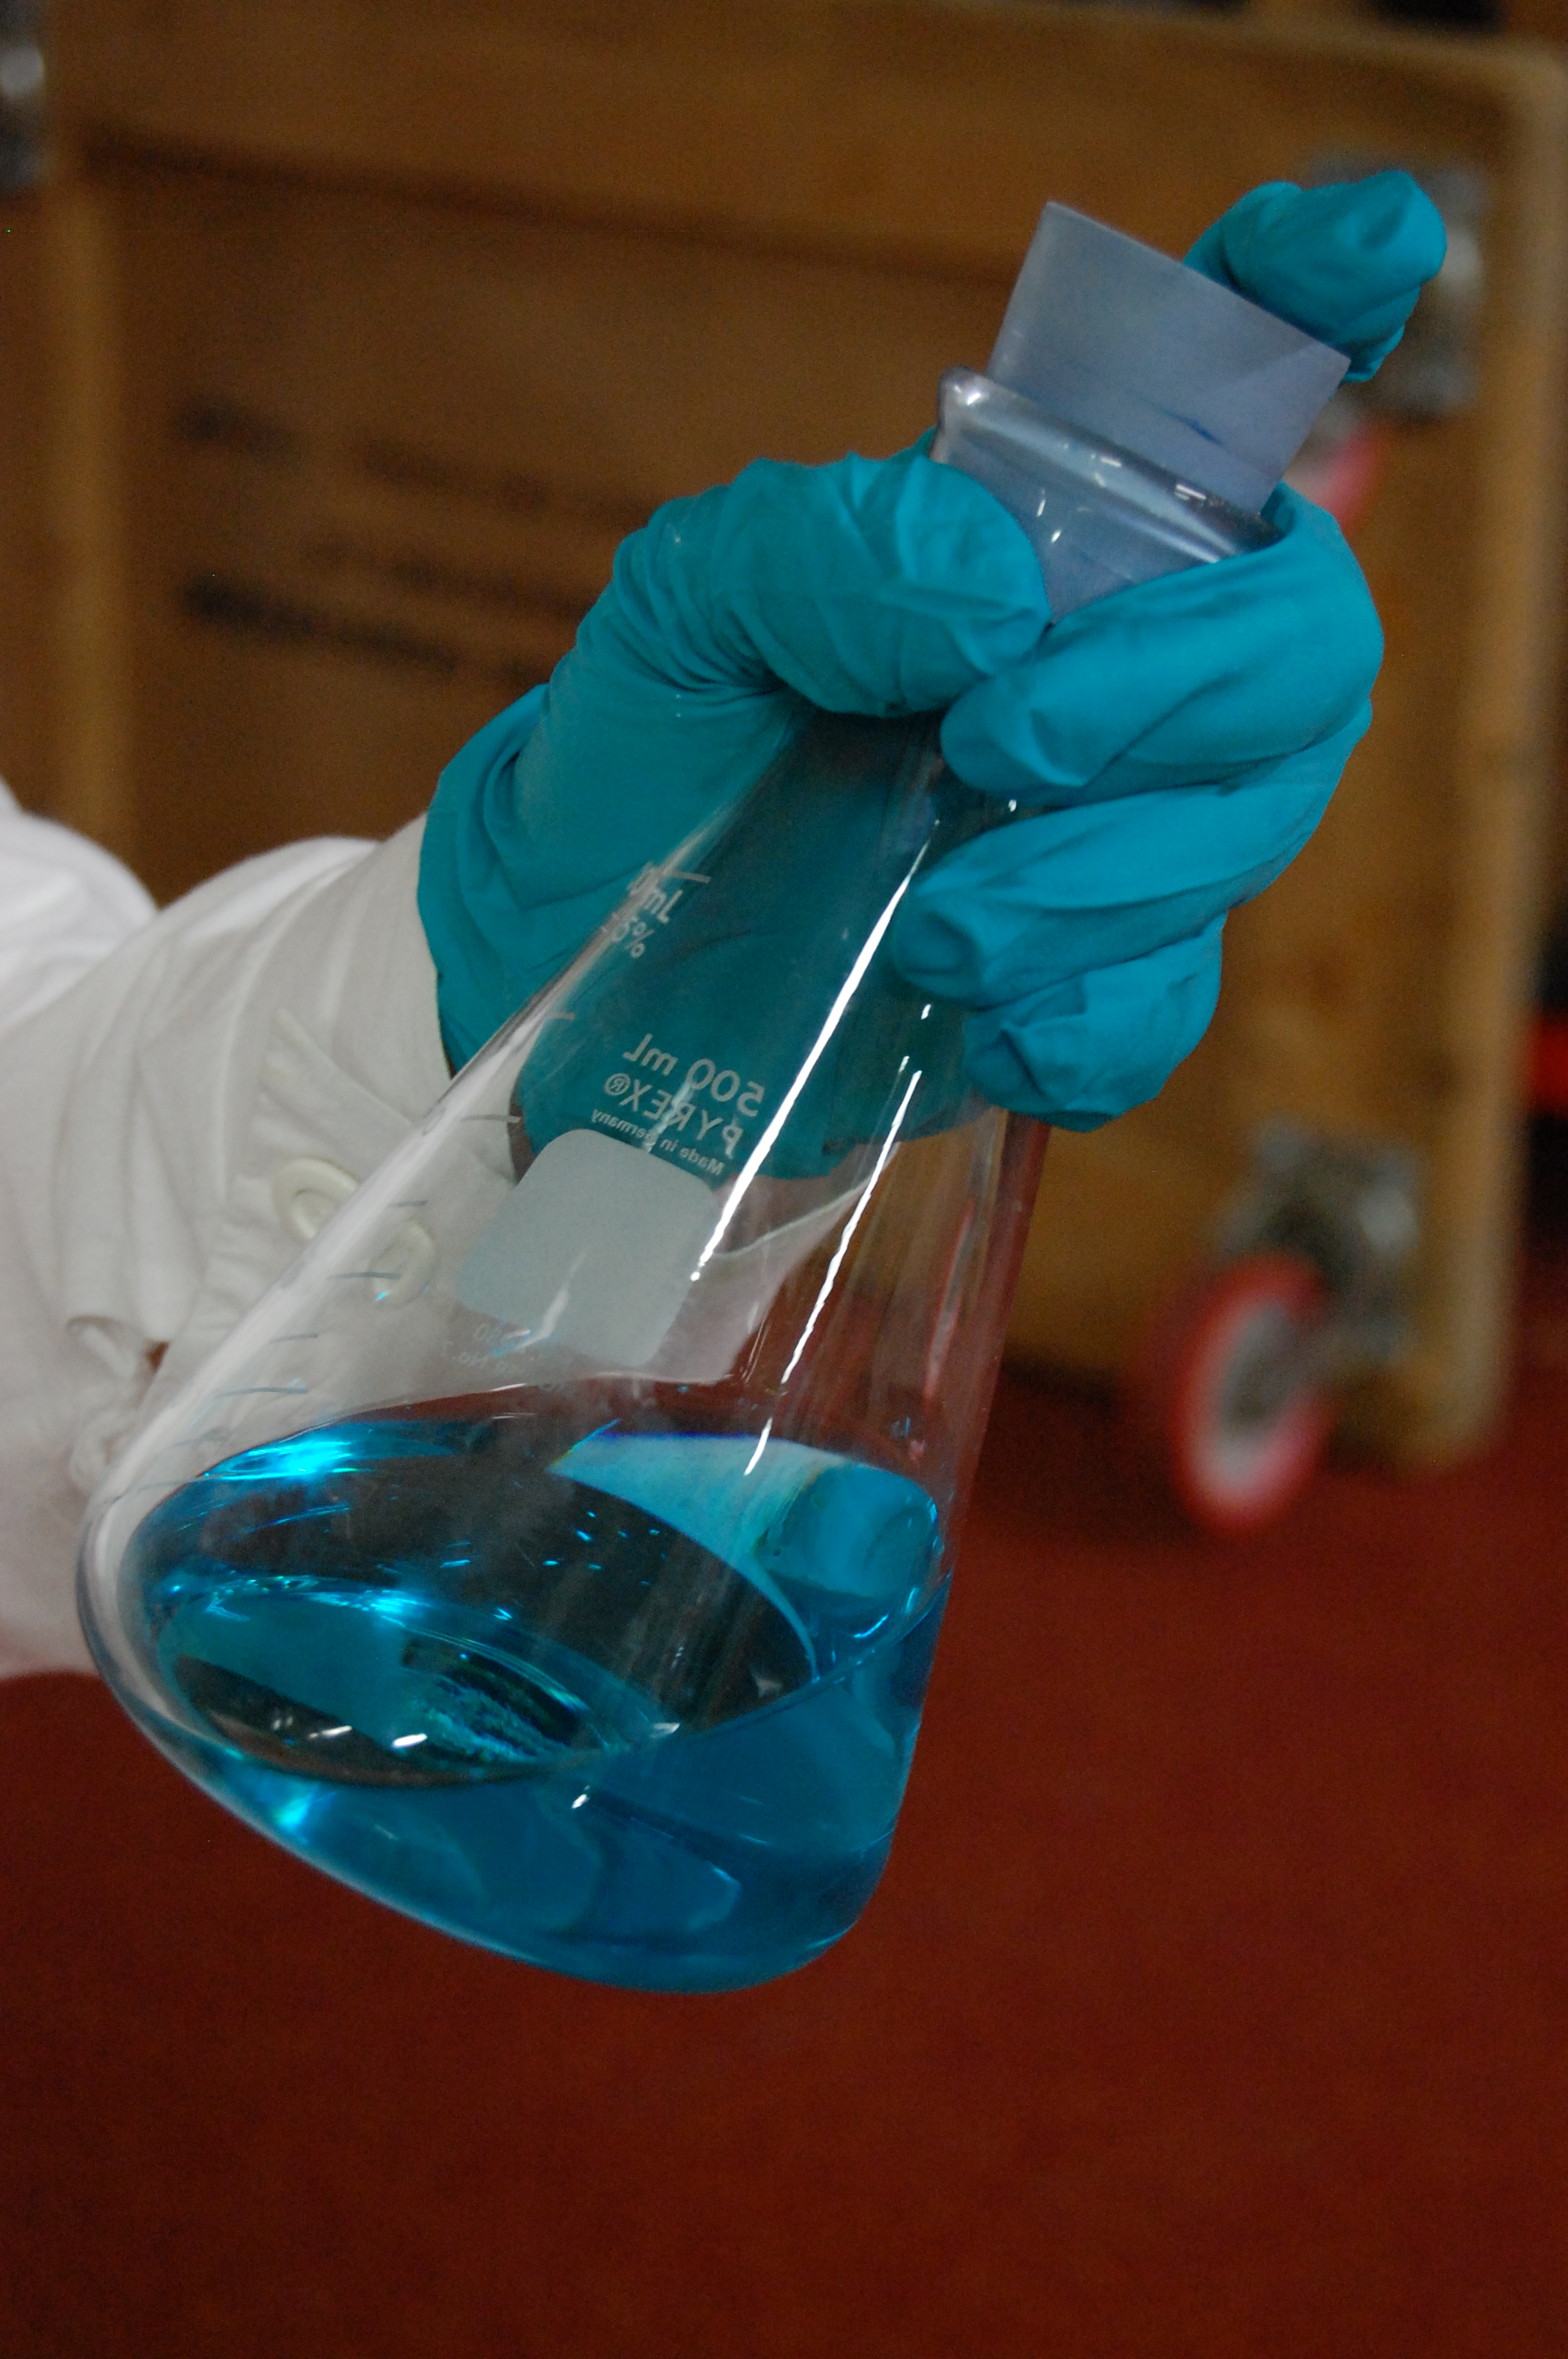
You’ll need the Python extension in VS Code in order to use tests. You also need to enable Pytest testing, which you can do by enabling “Python > Testing: Pytest enabled” in your settings. Once you do this, you will see a new tab in the activity bar that looks like an Erlenmeyer vial. It will display all of the tests discovered by the Python extension.
A good shortcut to remember is Ctrl+Shift+P, which opens up the command palette.
Using this tool, you can launch pretty much any action available. Ctrl+P opens
up the regular palette, from which you can open symbols, files and much more.
Another shortcut is Ctrl+K Ctrl+I, which allows you to simulate a “mouse
hover” over what the editor’s cursor is on. This is useful for opening a warning
panel (the squiggles under a function name for example).
PyCharm tips
![]()
Using a full IDE is fairly overkill (especially since VS Code can do the trick here), but can still be used and are significantly more powerful. If you enjoy using Rider, consider using PyCharm from JetBrains, who are the guys behind Rider. The free Community edition is fine, but you also have access to the Professional version with your EPITA email address1.
Here is a tip that applies to both PyCharm and Rider (and also to any IDE from JetBrains): you can “search anything” by simply double pressing the shift key (right or left), and using the window that appears to type in what you want to search: files, actions, settings… It also shows the various shortcuts associated with each action, which is great for learning how to use JetBrains IDEs very efficiently.
When launching PyCharm, open it directly at the root directory of your homework
(the one in which the login_homework.py file is), and point it to the
interpreter you have on your system if it asks for it.
If PyCharm complains with PEP8 warnings, know that this means that your code does not comply with the general Python coding style. Respecting the coding style is essential for a language like Python which is based on indentation and not curly brackets. You can find out more about PEP8 here.
Two other essential keyboard shortcuts to know when using the editor:
- Alt+Enter: When you are on an error or a warning, opens a small popup where you can select what you want to do to fix the problem
- Ctrl+Space: Opens up the autocompletion panel, which allows you to quickly fill the line.
Why use Unit Tests?
There are a few very good reasons for using unit tests. For those who do not know, a “unit test” is a small test that usually only tests a single function.
- It makes sure that your code works, which is nice
- It ensures that no regression happens in your code. A regression is when something that previously worked is broken by a change in the code. For homework tasks, a good example is checking if an optimization you’ve made leads to unexpected bugs.
- It gives you a direct approximation of how much has been done on your task. Writing your tests before writing your code can be an efficient way of making reliable code. It can even be the way you develop your entire project: this is known as TDD (Test-Driven Development).
- Creating unit tests before even starting to code your function gives you a better understanding of what said function is supposed to do. It basically forces you to look at the example. Trust me, it is very easy to skip an example when looking through the general specifications of the homework task.
- Click a button, test everything at once. It’s that simple.
- Testing your code is not that different from printing out the results and checking them manually. Here, instead of printing the results, you directly compare them with what you expected.
Side note: Making good unit tests
A unit test must be:
- Small: a true unit test must only test one unit of code at most2. A unit
of code can be
- A specific use case
- A specific edge-case that your code should handle.
- Repeatable: it can be ran multiple times without any change.
- Independent: it must be able to run independently if the other tests
You must think of your unit-tests not as specific tests of what your code does
but of what your code should do. Do note that there are also multiple valid
return values for certain functions: you will have to have more complex
assertions than just simple equality tests (result == expected) in these
cases.
Inspired by some of the points mentioned here.
Why pytest specifically?
Algo homeworks generally do not require huge amounts of testing or complex
interactions between tests. pytest is extremely simple to use and
straight-to-the-point, and does not require any sort of configuration in order
to be used, which is perfect for us. pytest can also be extended with plugins,
so, if something is missing in the basic pytest, a plugin probably exists.
Another massive advantage of pytest is that it only uses things you already
know, except for the assert keyword which will be explained later on.
Step 0: Installation
Install Python if you have not done so already. For this
guide, you will need to install pytest through pip, Python’s package
manager. Use the following in your favorite terminal:
pip install pytest
Run this and you should be good to go. You might need to use sudo to install
everything on UNIX systems (Linux, macOS).
Why not use a requirements.txt? If you are asking this question, (and
know how to deal with this kind of issue) feel free to use a requirements.txt
file, a venv and configure PyCharm or VS Code accordingly. I just felt like it
was not necessary for this specific guide, as it is for beginners for whom
requirements.txt shenanigans are not really important.
Step 1: My first unit test
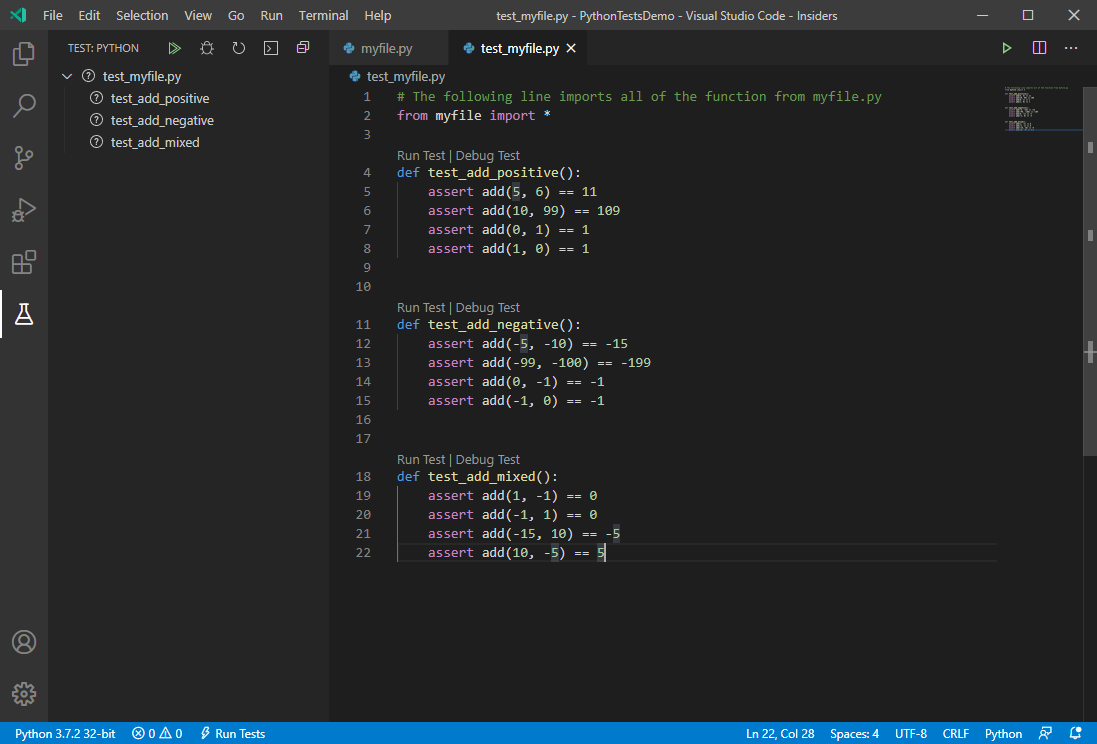
Creating a unit test is extremely simple. Say I have a function called “add” in my main file “myfile.py”, which takes two arguments and returns their sum. I could simply write a few unit tests for it like so in a file named “test_myfile.py”:
# The following line imports all of the function from myfile.py
from myfile import *


def test_add_positive():
    assert add(5, 6) == 11
    assert add(10, 99) == 109
    assert add(0, 1) == 1
    assert add(1, 0) == 1


def test_add_negative():
    assert add(-5, -10) == -15
    assert add(-99, -100) == -199
    assert add(0, -1) == -1
    assert add(-1, 0) == -1


def test_add_mixed():
    assert add(1, -1) == 0
    assert add(-1, 1) == 0
    assert add(-15, 10) == -5
    assert add(10, -5) == 5
This is a regular Python file, meaning you can write additional non-test
functions or do more crazy Python things. Test functions are identified by their
test_ prefix.
Nothing here is really new for you, apart from the assert keyword. In Python,
the assert keyword does nothing if the condition you give it is true, and
crashes if the condition is false (it raises an AssertError). It is a way of
saying “I’m sure that this condition is true, so make sure that it indeed is”.
This is basically the entire point of unit tests, and in case of a failure
pytest extracts information from the resulting error to show exactly what
went wrong.
Each test_ function will show up as a separate test. You can see that each
assert statement corresponds to a separate test of the add function.
You may notice that, although we have no information on how the function was implemented, we can still create a lot of test cases, including trickier patterns like adding two negative numbers, mixing and matching negative and positive numbers, or even cases where we should get 0. If you are ever lost while writing test-cases, always think about what could be some nasty case that I wouldn’t want to have to deal with. Talk with fellow students about which cases they think are complicated, write tests for these cases, and check if your code is able to handle these test cases properly. Get creative!
Step 1.1: Using examples as unit tests
The subject will often feature examples of the result a function should give. Say you have the following in your subject:
>>> my_amazing_function("Abcde", 123, BinTree("all your bintrees are belong to us", None, None))
[("kb.zoroark.guru", 50), ("is alright", 25)]
We can directly re-use them as unit tests!
def test_amazing_function():
  result = my_amazing_function("Abcde", 123, BinTree("all your bintrees are belong to us", None, None))
  assert result == [("kb.zoroark.guru", 50), ("is alright", 25)]
It is a good idea to separate the function call from the comparison to the
expected result. This way, if your code fails with an exception (i.e. it
actually fully crashes because of the function you’re testing instead of just
failing at the assertion), you know that it is caused by your function because
it will indicate the line with the call to my_amazing_function. This will also
help you isolate cases where something was None somewhere. Failed on the
assert? Might be a None problem. Failed on the function call? Something went
wrong inside your code.
Step 2: It’s time to test!
You have a few options here, but it mostly comes down to whether you are using PyCharm, VS Code or something else.
Step 2A: Using PyCharm
You will only have to do step 2A.1 once to tell PyCharm how to test your code.
Step 2A.1: Creating a configuration
Click the “Add Configuration” button in the top-right corner (or the existing configuration’s name and then Edit Configurations). Click the + in the top left corner, pick “Python Tests” and then “pytest”. Give it a nice name, and put the name of your test file in the text field right below “Target”. When you are done, click OK, and you can now run the test suite.

Step 2A.2: Running the tests
You can now run your test suite like any other run configuration, and you should see something like this pop up.

On the left, you can see the file that was just tested (test_myfile) along
with the output from pytest on the right. Clicking on each individual test
will display what was printed during the test, and details about the error (if
any). If the test passed successfully and nothing in particular was printed, you
will only see a dot.
Make sure that the “Show passed test” box is enabled (the tick on the top left of the results panel).
What if one of our tests fails?
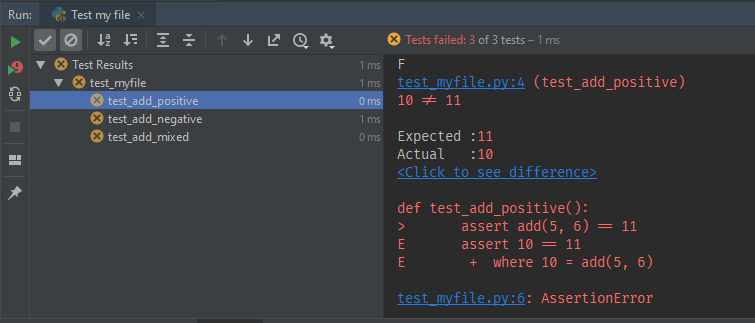
Clicking on each failing test will give you detailed information on what failed in the assert statement.
If the assert did not fail but an exception happened, pytest will also give
you full insight on which function failed. Of course, a malformed test file will
crash the entire testing sequence immediately and you will only get an error
message. If the original file you are testing has a syntax error somewhere
inside of it, that will also crash the testing sequence immediately.
A few tips: right-clicking on a test allows you to relaunch it separately, and you have a button on the left of the tests panel to relaunch only failed tests.
Step 2B: Using VS Code
First of all, make sure you’ve installed Python and enabled Pytest in VS Code.
Click on the vial icon. You should be met with this panel:
If tests do not show up, click on the “refresh” icon in the test panel to let VS Code re-discover your tests. By default, VS Code will try to discover your tests every time you save your files.
You can now run tests in a few ways:
- By clicking on an individual “Run test” button right above the test you want to run
- By clicking on the “Run all tests” button (that looks like a double arrow) in the test panel
- By launching the test from the test panel
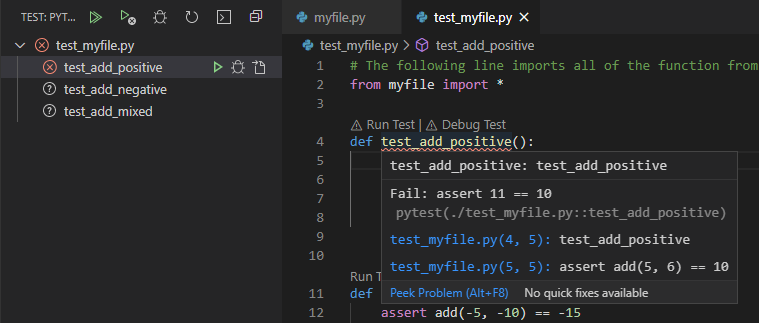
If a test fails, it gets highlighted in the code editor. Hover your mouse over
the failed test’s name to see more information (or use the shortcut
Ctrl+K Ctrl+I with your text cursor on the underlined text). You can also open
the Python Test Log output (Ctrl+Shift+U and select Python Test Output in the
dropdown menu) to get Pytest’s output.
See this link for more information on Python testing in VS Code.
Step 2C: Using any shell
I am using PowerShell in the following example, but you can use anything.
Running pytest is done with the following command:
pytest test_myfile.py
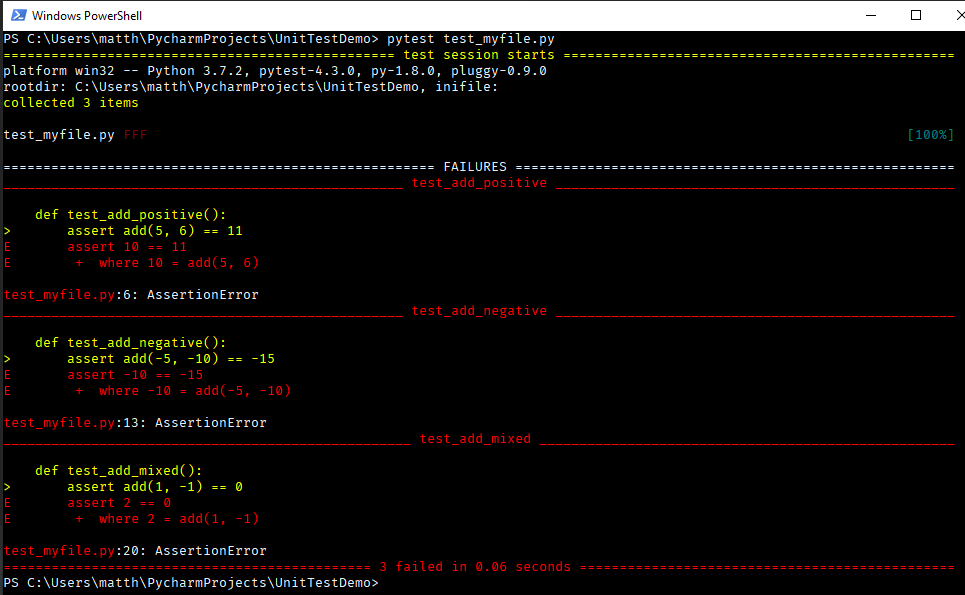
The results are fairly similar to what can be seen in PyCharm, so I am just leaving the screenshots as examples.
You can also just run the following command, and pytest will figure out where
the tests are on its own:
pytest
… yup, that was pretty simple to type. And now that I have recovered my
missing brain cells and fixed my function, pytest shows us that, indeed, the
unit tests work, hurray!

Done!
Congrats! You now know how to write unit tests for your homework project.
Need more out of your unit tests? I suggest you create very long ones which
would be used to benchmark your algorithm. Use them in conjunction with cProfile
to get detailed profiling results to determine which functions get the most
calls. If enough people are interested, I might make a more detailed tutorial,
but it all boils down to these few lines:
# at the beginning of the file
import cProfile

# in one of your benchmarking unit tests
    prof = cProfile.Profile()
    prof.enable()
    # the code you want to profile
    prof.disable()
    prof.print_stats("calls")
You will get a very detailed output with the number of calls for every function
used between the enable and disable calls, as well as the time spent in each
function. This should be your starting point for optimizing both the number
of function calls and the time spent in each function. Good luck!
Footnotes
-
One particularly convenient feature of the paid version of PyCharm is code coverage right inside the IDE, but you can use coverage tools without that. Overall though, PyCharm is quite nice because it gives you a cozy environment where you don’t have to worry too much about configuring your stuff. ↩
-
This is the best case scenario: you can of course put multiple test cases (i.e. multiple
asserts) in the same unit test, but some prefer having “real” unit tests that really only test one “thing”. ↩